2025/09/09
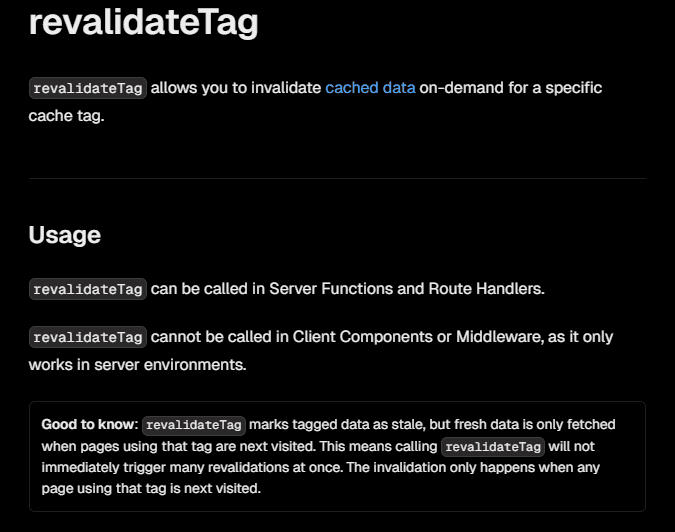
首先在RSC取得post data 然後傳給 client component,請注意sanity 的 fetch function 除了query之外還要加上兩個參數 (變數, Next.js 資料快取選項)
1// src/app/[lng]/(home)/_components/PostsSection.tsx  ← Server Component(不要 "use client")
2import Grid from "@mui/material/Grid";
3import PostCards from "@/components/UI/PostCards";
4import { client } from "@/sanity/lib/client";
5import { PostDoc } from "@/schema/type/post";
6
7export default async function PostsSection() {
8  // SSR 取得文章資料
9  const posts = await client.fetch<PostDoc[]>(
10    `*[_type == "post"] | order(_createdAt desc) {
11      _id,
12      _createdAt,
13      title,
14      description,
15      photo,
16      "slug": slug.current,
17      categories[]->{
18        _id,
19        title,
20        "slug": slug.current
21      },
22      author->{
23        _id,
24        name,
25        "slug": slug.current,
26        email,
27        avatar
28      }
29    }`,
30    {}, // 這邊查詢所有post,不設定變數
31    { next: { tags: ["posts"] } }
32  );
33  return (
34    <Grid container spacing={2} columns={12}>
35      <PostCards posts={posts} />
36    </Grid>
37  );
38}
39設定revalidate tag同sanity fetch 的 tag,並且為了防止濫用可加上一個REVALIDATE_SECRET code (可選)
1// app/api/posts/revalidate
2import { NextRequest, NextResponse } from "next/server";
3import { revalidateTag } from "next/cache";
4
5export async function POST(req: NextRequest) {
6  const secret = req.nextUrl.searchParams.get("secret");
7  if (secret !== process.env.REVALIDATE_SECRET) {
8    return NextResponse.json({ error: "Invalid secret" }, { status: 401 });
9  }
10  console.log("Revalidating posts");
11  revalidateTag("posts");
12  return NextResponse.json({ revalidated: true, now: Date.now() });
13}
14到後台設定webhook 的觸發條件、觸發的api route。
設定webhook,免費版本只有兩個可用,剛好一個測試一個deploy用,以測試的來說明。
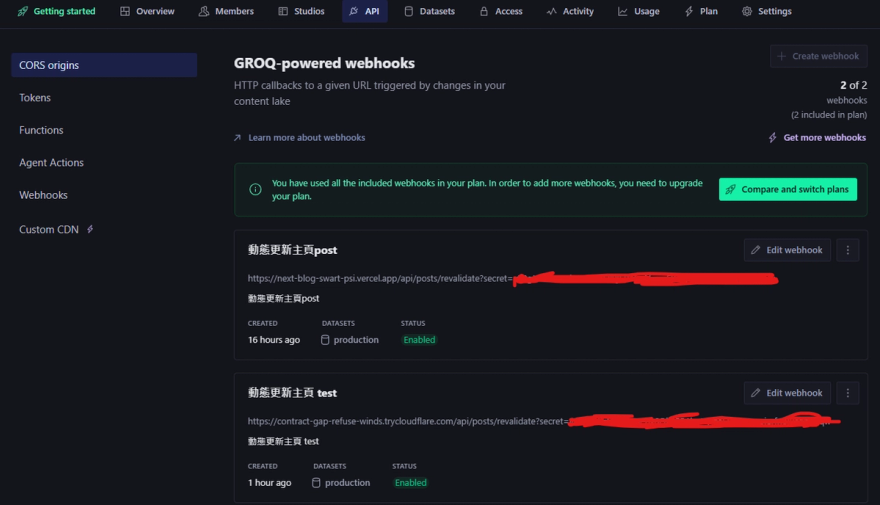
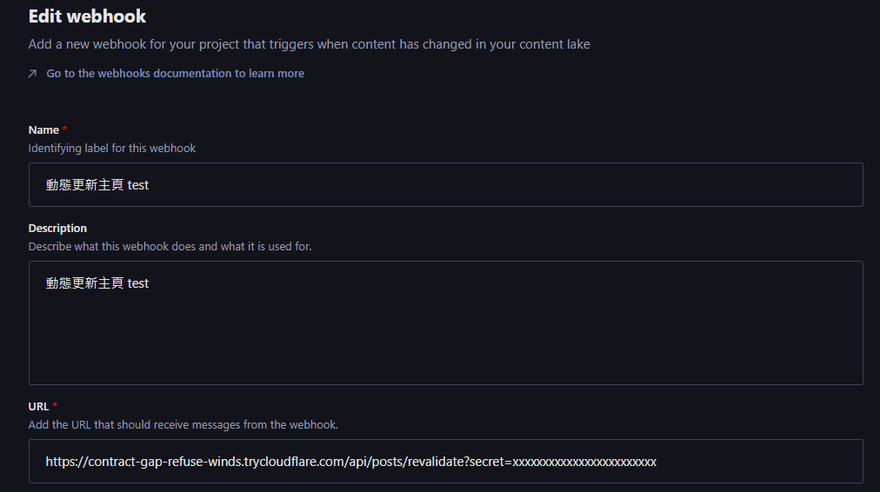
URL 需要注意無法用localhost:3000 所以要使用 Cloudflare Tunnel 來讓 Sanity Webhook 可以直接存取的本機 API
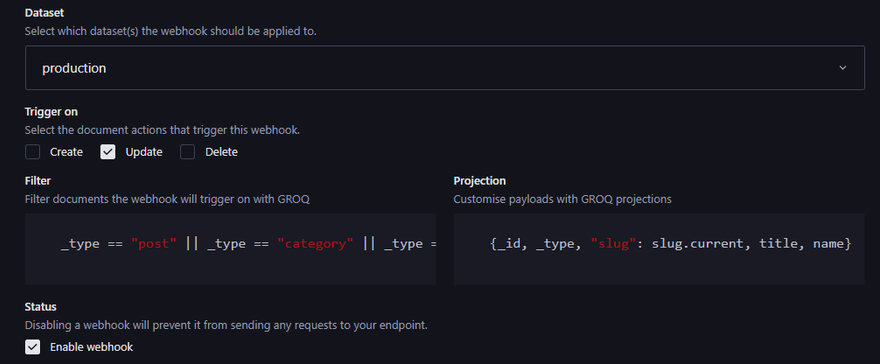
設定觸發條件:
Filter 代表哪些type會觸發條件,這邊設定 post、category、author 更新時會觸發
Projection 代表發送時 payload(內容)要帶哪些欄位
如果設定成功就能看到 log